Step 8
We have connected our demo application to our MongoDB cluster in the cloud. Let's store some data! Before doing so, we need to understand how MongoBD organizes data.
A Mongo Database is made up of collections and documents.
A collection represents a single entity in your app. For example in our YouNote app, we have "notes" and we may later add other entities like "users". Each of such entities will be a single collection in our database.
A collection contains documents. A document is an instance of the entity represented by the collection. For example, a collection called notes will have documents each representing a note. Each "note" document would contain the attributes that make up a note (such as "content", "author", etc). A document in MongoDB looks a lot like a JSON object.
If you have never worked with a database, it may be helpful to think about collections as folders and documents as files organized inside the folders.
If you have experience working with databases, it most likely has been with a Relational database. (For those never heard of it, you can think of relational databases like spreadsheets where data is structured in tables and each entry is a row in a table.) MongoDB is not a relational database although you can think of collections as tables and documents as the rows (records) in a table.
For this demo application, we will make a collection of "users". Each user will have a "username" and a "password". As the first step, we will define a schema for "user" documents. According to MongoDB documentation:
A document schema is a JSON object that allows you to define the shape and content of documents embedded in a collection. You can use a schema to require a specific set of fields, configure the content of a field, or to validate changes to a document based on its beginning and ending states.
Add the following to index.js:
const Schema = mongoose.Schema;

const UserSchema = new Schema({
  username: { type: String },
  password: { type: String },
});
We are using the Schema class from Mongoose to create a document schema for users. The code snippet above essentially establishes that a user will have a username and a password and both of these attributes are going to be of type String.
Next, we create a model:
const User = mongoose.model("User", UserSchema);
Notice the first argument to mongoose.model is the singular name for the entity your model is for. Mongoose automatically looks for the plural, lowercased version of your model name as the collection that holds documents of that model. Therefore, the model "User" will result in construction of a users collection in the database.
Models are one of the constructs which Mongoose brings to the table. You can link a document schema to a model, then use the model to construct documents, as shown in the example below:
User.create(
  {
    username: faker.internet.userName(),
    password: faker.internet.password(),
  },
  (err, user) => {
    if (err) console.log(err);
    console.log(user);
  }
);
Aside: Faker package
We use the faker package to generate fake (but realistic) username and password! Don't forget to import the faker package
const faker = require("faker");
The create method attached to a Mongoose model allows you to create documents of that model. It takes two arguments: an object representing the data to be saved in the database, and a callback function. The create method invokes the callback function by passing two arguments to it: an error (which will be null if there was no error) and the document created (which will be null if there was an error).
Save the index.js file and run it. If all goes well, you will get the user document (which looks like a JSON) printed to the terminal.
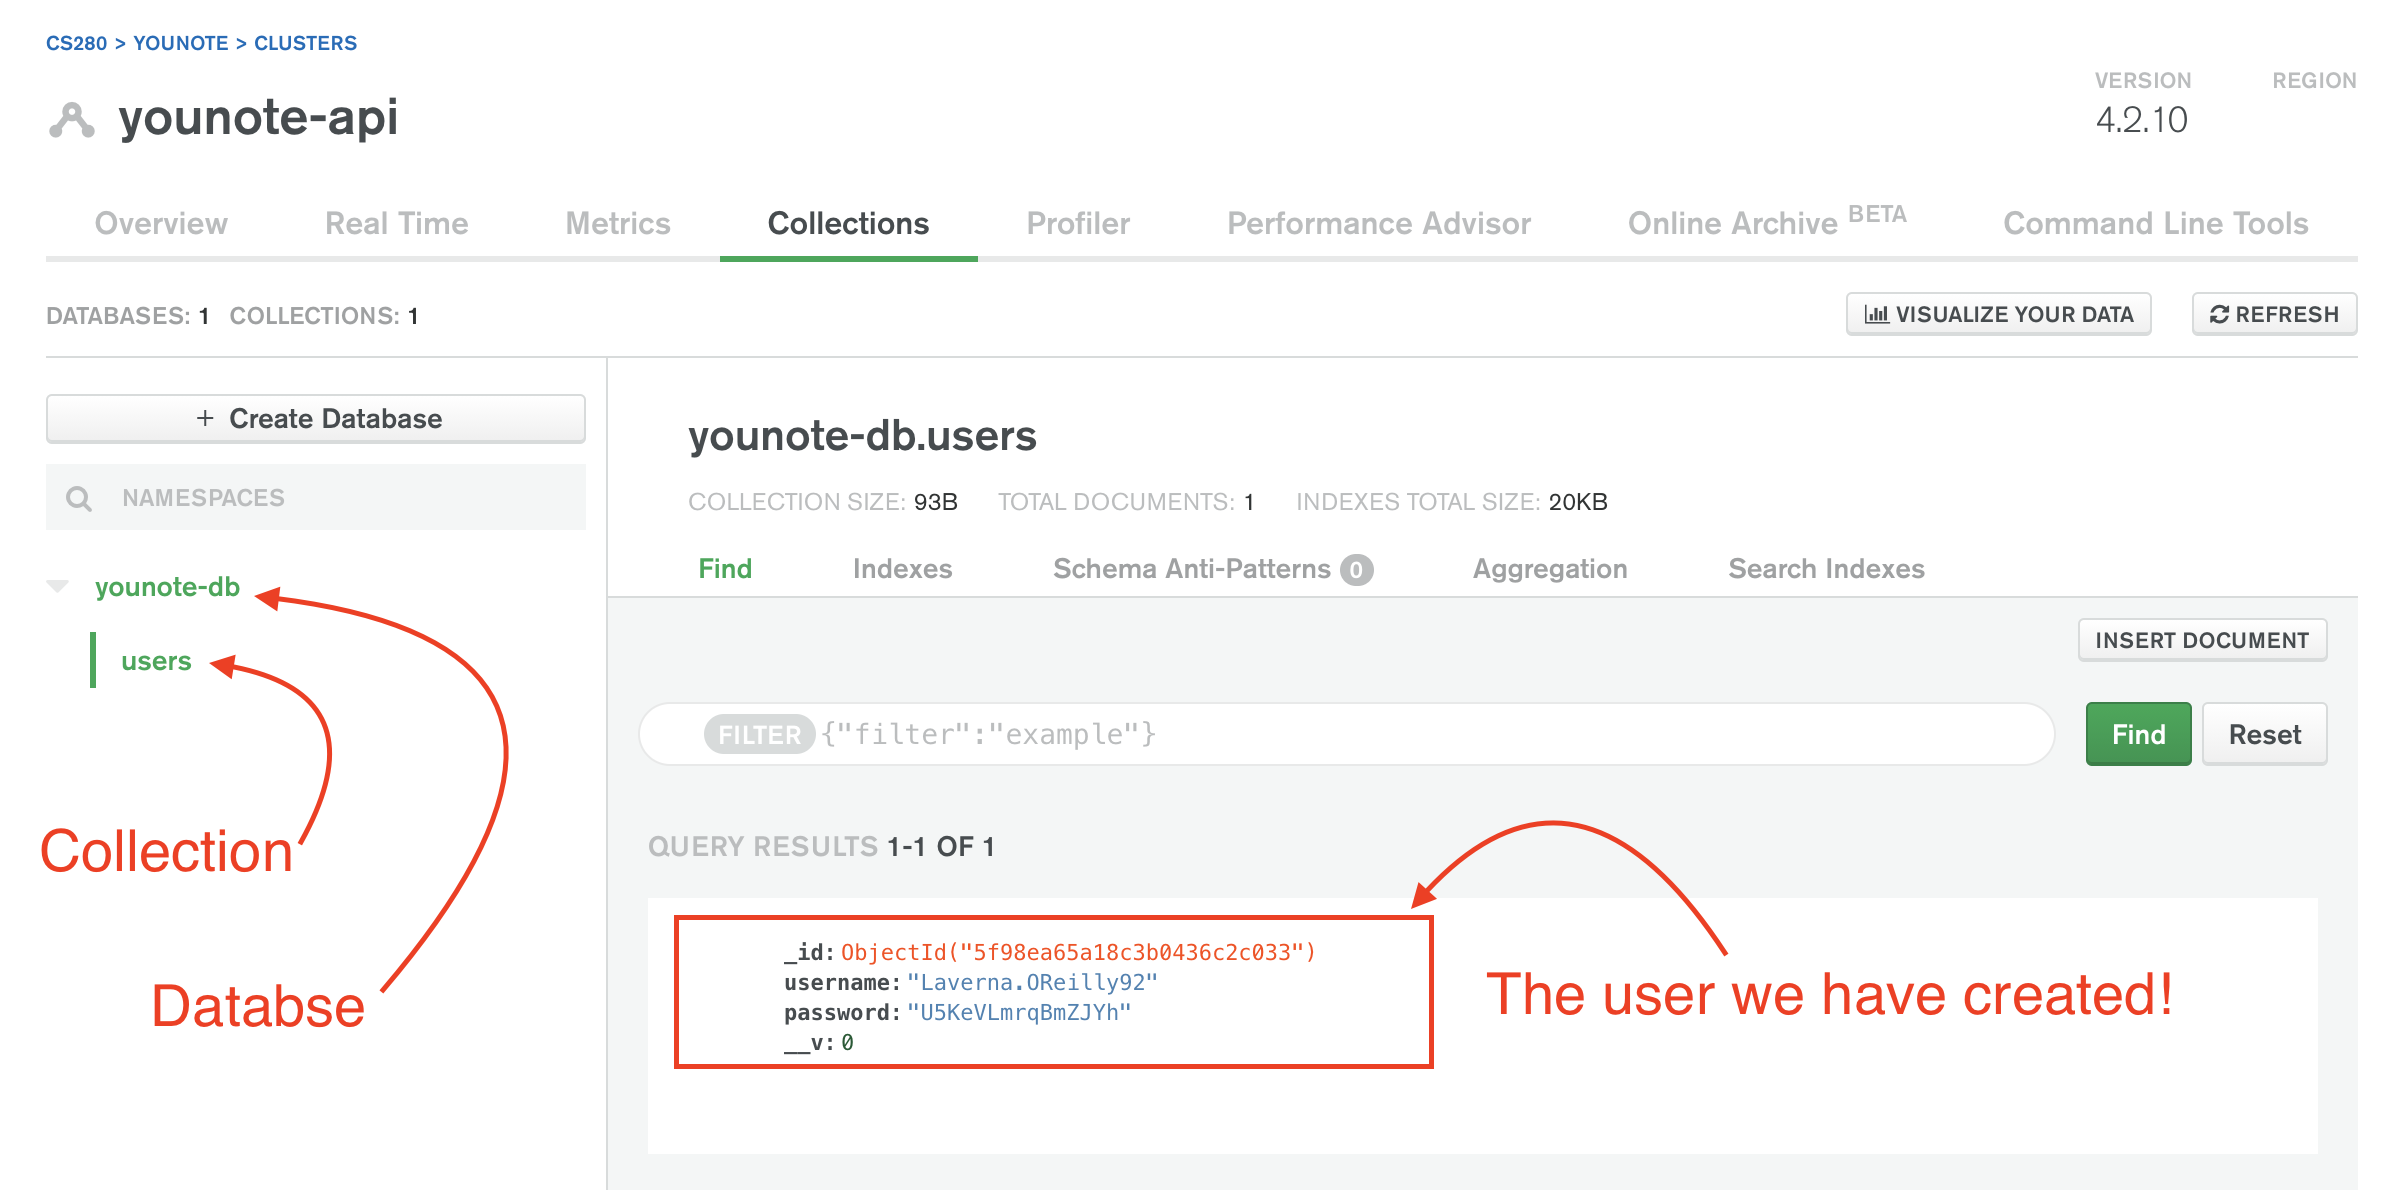
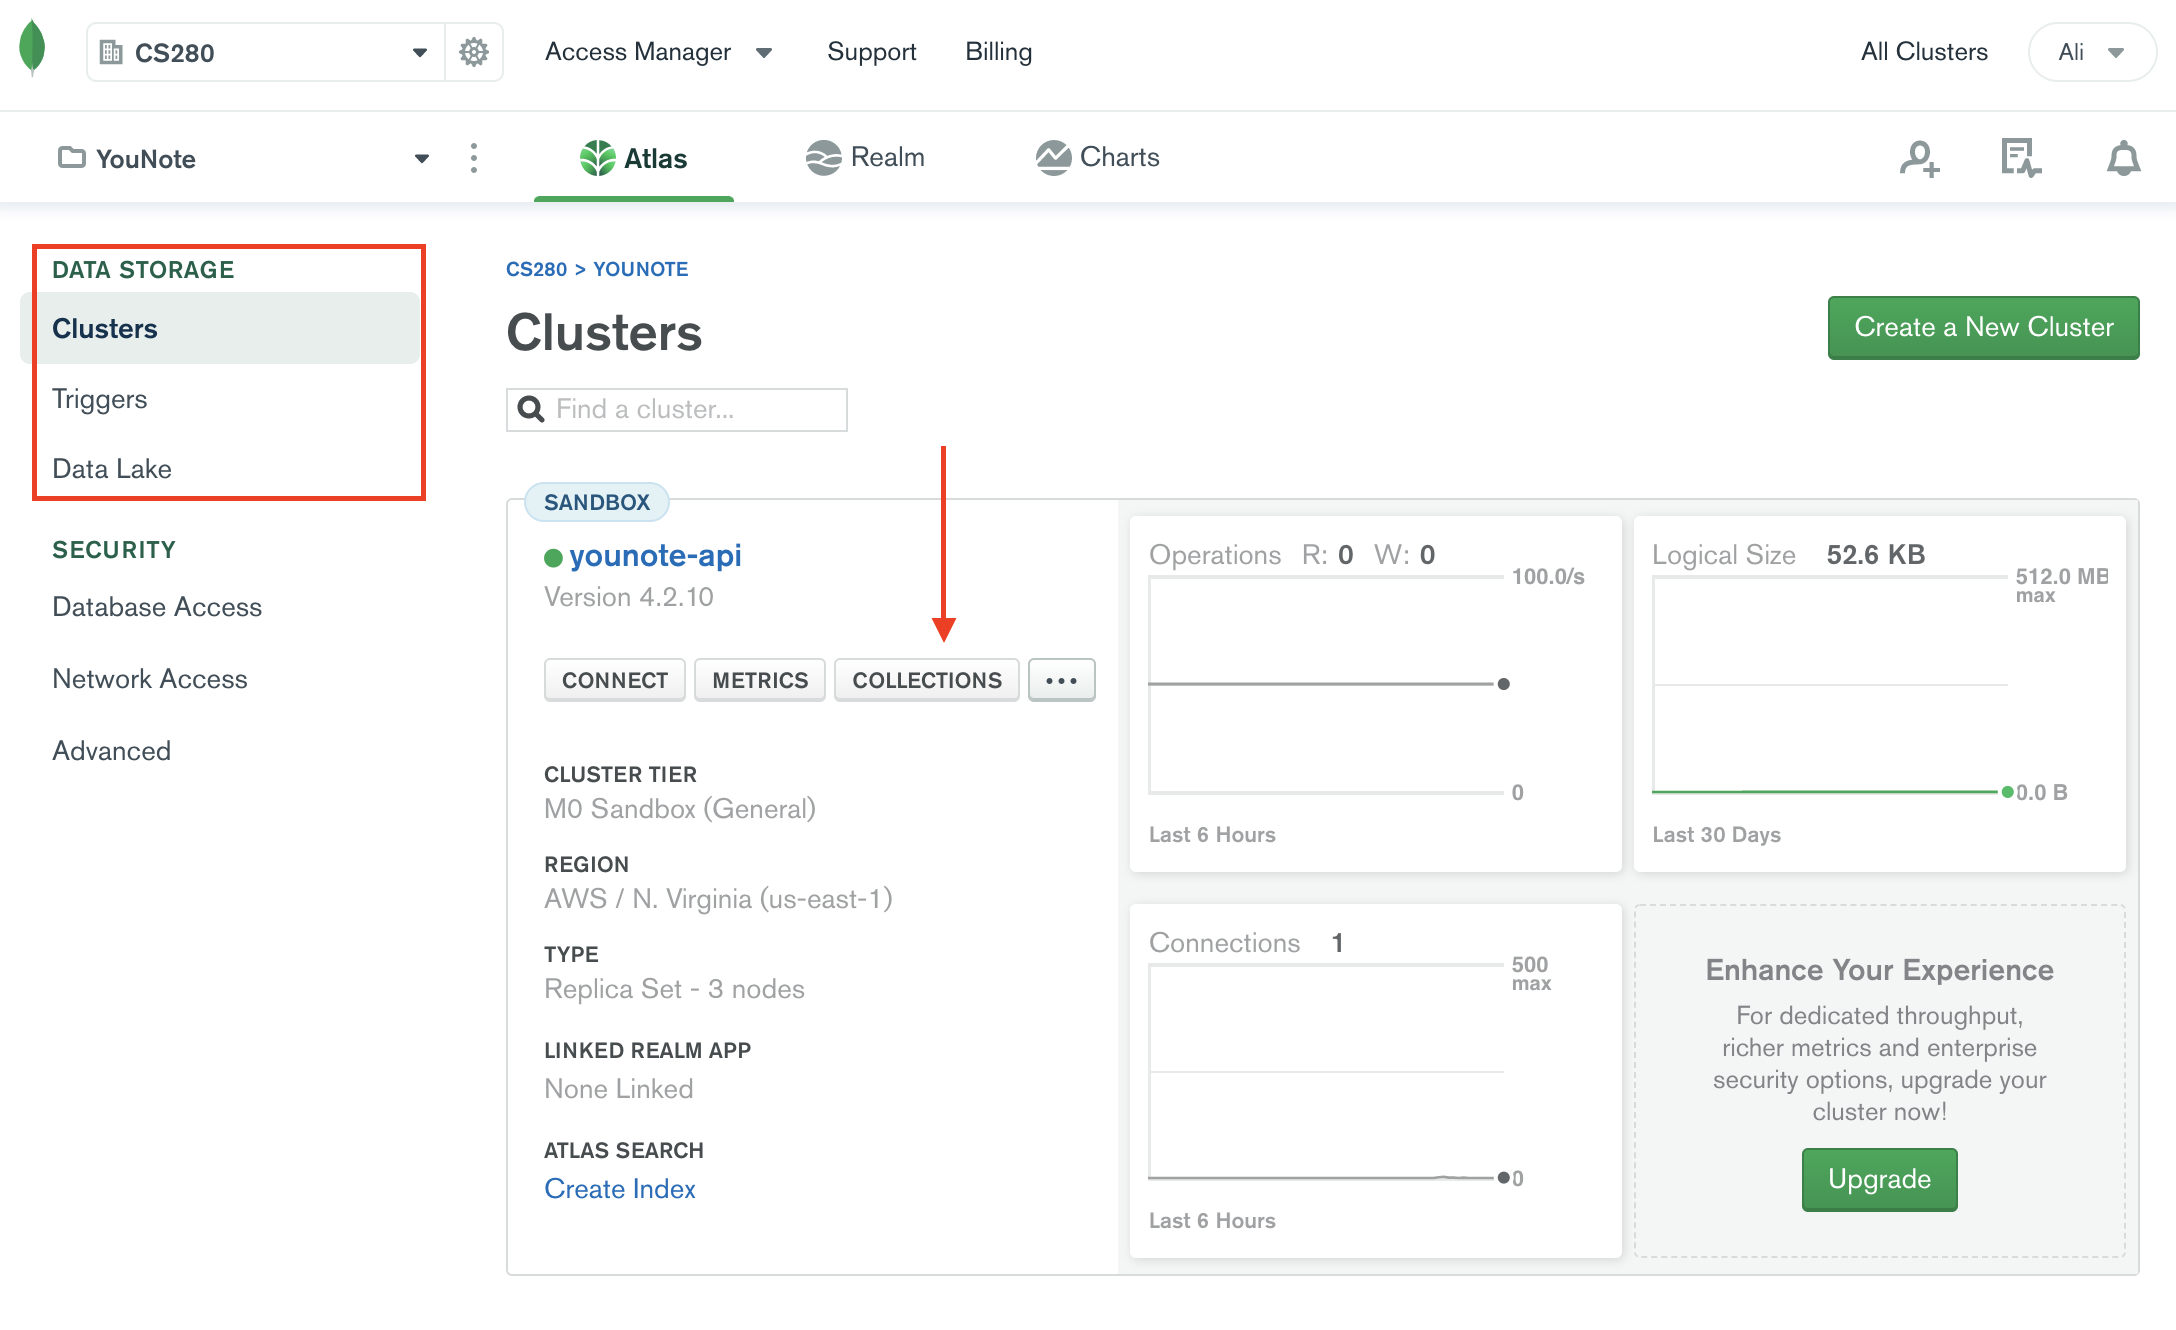
Once the data is printed to the terminal, head over to MongoDB Atlas website. Find your cluster and click on the "Collections" button.
You must be able to find the user we have just created!